Label Design: Testing and Validation
Label designer software is a powerful tool for creating and designing labels. some essential key steps to test and validate label designs before printing to ensure that they are error-free, have the correct information, and meet the desired visual appearance:-
Step 1: Verify the label designThe first step in testing and validating label designs is to verify the label design itself. Check if the design meets the requirements specified by the customer or regulatory agency. Also, check if the design is consistent with the company's brand guidelines, including color schemes, font choices, and logo placement. Verify that the design does not contain any errors in terms of spelling, grammar, or punctuation.
Step 2: Check label dimensions and printer compatibilityThe next step is to check the label dimensions and printer compatibility. Ensure that the label dimensions are correct and match the label size intended for printing. Verify that the label designer software supports the printer being used to print the labels. Some label designer software may not be compatible with certain printers or label materials, so it is essential to ensure that the software supports the printer being used.
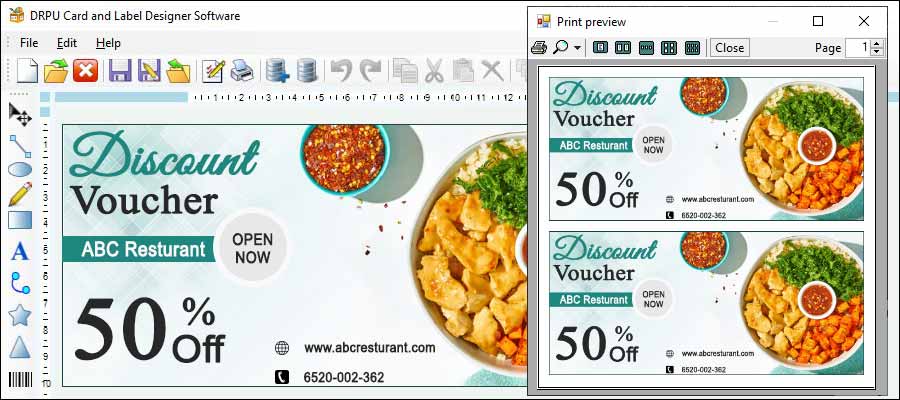
Step 3: Conduct a print testThe third step is to conduct a print test. Print a sample label to check the print quality and color accuracy. Verify that the label is correctly aligned and centered on the label material. Check if the font size and style are legible and that the graphics and images are clear and sharp. Print tests are crucial, as they help identify any printing issues before a large print run, ensuring that any issues are resolved beforehand.
Step 4: Verify barcode and QR code functionalityIf the label design includes a barcode or QR code, it is essential to verify that it functions correctly. Test the barcode or QR code with a scanner to verify that the information encoded is accurate and that the scanner can read it. Ensure that the barcode or QR code meets the required format and size specifications.
Step 5: Review the label design againOnce you have conducted a print test and verified the barcode or QR code functionality, it is time to review the label design again. Double-check that the design is correct and meets all requirements. Review the print quality, font size, and graphics again, looking for any issues that may have been missed in the initial review.
Step 6: Get feedback from stakeholdersIt is also a good idea to get feedback from stakeholders, such as the customer or regulatory agency. Share the label design with them and ask for their input. They may have additional requirements or suggestions that could improve the label design or catch any issues that may have been overlooked.
Step 7: Save the label designFinally, save the label design in the appropriate file format. Ensure that the file is in a format that can be used by the printer or label manufacturer. It is also a good idea to keep a backup of the label design in case any changes need to be made in the future.
Download and Install Label Design Software
Most Useful Keyboard Shortcuts and Tools in Label Designer Software
Label designer software can be a powerful tool for creating high-quality labels, but it can also be time-consuming if you're not familiar with the keyboard shortcuts and tools that can help improve efficiency and productivity. The most useful keyboard shortcuts and tools in label designer software that can help you work more efficiently and effectively.
Most Useful Tools:
- Layers: Layers can help you organize your design and make it easier to edit specific parts of your label. By using layers, you can group related objects together and easily hide or lock specific layers as needed.
- Grids and Guides: Grids and guides can help you align objects and create a more precise design. Most label designer software includes tools for creating grids and guides that can be customized to meet your specific needs.
- Templates and Design Libraries: Templates and design libraries can save you time by providing pre-designed elements that you can use in your label design. By using templates and design libraries, you can quickly create a professional-looking label without starting from scratch.
- Barcode and QR Code Support: Barcode and QR code support can help you create labels with unique identification codes that can be used for inventory tracking or other purposes. Most label designer software includes tools for creating barcodes and QR codes that can be customized to meet your specific needs.
- Color Management: Color management tools can help you ensure that your label design looks consistent across different devices and printers. By using color management tools, you can create a more professional-looking label that accurately reflects your brand.
- Preview and Printing: Preview and printing tools can help you ensure that your label design looks as intended when printed. Most label designer software includes tools for previewing your label design and adjusting printing settings to ensure that it looks great when printed.
Most Useful Keyboard Shortcuts:
- Ctrl + C / Ctrl + V: Copy and paste selected objects or text.
- Ctrl + Z / Ctrl + Y: Undo and redo your last action.
- Ctrl + A: Select all objects in the current design.
- Ctrl + Shift + A: Deselect all objects in the current design.
- Ctrl + Shift + Drag: Duplicate an object while dragging it.
- Ctrl + Shift + Arrow Key: Nudge selected objects in the direction of the arrow key.
- Ctrl + F: Find and replace text in the current design.
- Ctrl + Shift + F: Open the font dialog box.
- Ctrl + G: Group selected objects together.
- Ctrl + Shift + G: Ungroup selected objects.
In conclusion, the most useful keyboard shortcuts and tools in label designer software include copy and paste, undo and redo, selection, duplication, nudging, find and replace, font dialog, grouping and ungrouping, layers, grids and guides, templates and design libraries, barcode and QR code support, color management, and preview and printing. By using these keyboard shortcuts and tools, you can work more efficiently and effectively, saving time and creating high-quality labels that meet your specific needs.
Collaborate with other Designers and Stakeholders
Label designer software can be a powerful tool for collaboration among designers and stakeholders, allowing for efficient communication, feedback, and collaboration throughout the design process.

- Start with a clear project plan and scope Effective collaboration starts with a clear project plan and scope that outlines the goals, objectives, and requirements of the project. This will help ensure that all stakeholders are on the same page and have a clear understanding of what needs to be accomplished. When working with label designer software, it's important to identify the specific features and functionalities that will be needed to achieve these goals, such as barcode support, color management, and label templates.
- Use collaboration tools to share feedback and ideas One of the key benefits of label designer software is the ability to share feedback and ideas in real-time. Most label designer software includes collaboration tools such as comments, annotations, and version control, which allow team members to share feedback and ideas with each other easily. By leveraging these tools, designers and stakeholders can provide feedback and suggestions throughout the design process, ensuring that the final product meets everyone's needs and expectations.
- Update your inventory management system: Make sure that your inventory management system is updated in real-time whenever an item is scanned or moved. This will ensure that your inventory counts are always up-to-date.
- Establish clear roles and responsibilities Collaboration can quickly become chaotic if there is no clear definition of roles and responsibilities. Before beginning a project, it's important to establish clear roles and responsibilities for all team members, including designers, stakeholders, and project managers. This will help ensure that everyone knows what they are responsible for and can work together effectively to achieve the project goals.
- Use templates and design libraries for consistency To ensure consistency across all label designs, it's important to use templates and design libraries when working with label designer software. Templates can help ensure that all labels have a consistent look and feel, while design libraries can provide a repository of reusable design elements that can be used across multiple projects. This can save time and reduce errors, as designers can quickly access pre-designed elements and focus on customizing them to meet specific project needs.
- Test and iterate on designs Collaboration is an iterative process, and it's important to test and iterate on label designs to ensure that they meet the needs of all stakeholders. Using label designer software, designers can quickly create multiple design iterations and share them with stakeholders for feedback. By iterating on designs, teams can refine their ideas and ensure that the final product meets everyone's needs and expectations.
- Use project management tools to stay organized Collaboration can quickly become overwhelming without the right tools to stay organized. Using project management tools such as calendars, task lists, and project dashboards can help teams stay on track and ensure that everyone is working towards the same goals. Label designer software can integrate with these project management tools, allowing teams to stay organized and focused throughout the design process.
- Communicate regularly and transparently Effective collaboration requires regular communication and transparency among all team members. Using label designer software, teams can share progress updates, project timelines, and feedback in real-time, ensuring that everyone is up-to-date on project status. Regular communication can help prevent misunderstandings and ensure that everyone is working towards the same goals.
In conclusion, effective collaboration using label designer software requires a clear project plan, collaboration tools, clear roles and responsibilities, templates and design libraries, testing and iteration, project management tools, and regular communication. By leveraging these best practices, designers and stakeholders can work together to create high-quality label designs that meet everyone's needs and expectations.
