Wedding Card Maker is Use to Create Custom Designs
🞛 To use a wedding card maker software to create a custom design, follow these general steps:

-
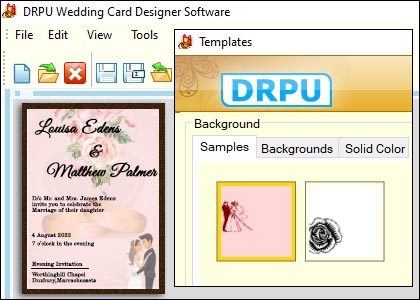
Select a Template: Most wedding card maker software provides a range of pre-designed templates to choose from. Look for a template that matches your desired style, theme, and color scheme. You can usually preview the templates before making a selection.
-
Customize Layout: Once you've chosen a template, you'll likely have the option to modify the layout. This may involve resizing and repositioning elements such as text boxes, images, borders, or decorative elements. Some software tools may allow you to add or remove specific components of the template.
-
Add Text: Personalize your wedding card by adding text. Click on the text box within the template and input your desired content. This typically includes details such as the names of the bride and groom, the date and time of the wedding, the venue, and any other relevant information. You can usually customize the font, size, color, and alignment of the text.
-
Insert Images: To include images in your wedding card design, look for options to upload your own pictures or choose from a library of stock images provided by the software. Typically, you can click on an image placeholder within the template and replace it with your selected image. You may be able to adjust the size, position, and orientation of the images as well.
-
Modify Colors: Most wedding card maker software allows you to change the colors of various elements within the template. This includes backgrounds, borders, text, and other design elements. Look for color customization options, which may involve a color picker tool or a selection of predefined color palettes. Experiment with different color combinations until you achieve the desired look.
-
Apply Effects and Filters (optional): Some advanced wedding card maker software may offer additional features such as filters, effects, or overlays. These options can help enhance the overall appearance of your design. For example, you might apply a vintage filter, add a soft glow effect, or overlay a floral pattern onto the background. Use these features sparingly and make sure they align with your chosen theme.
-
Preview and Make Adjustments: Before finalizing your design, take advantage of the software's preview function. This allows you to see how the card will look once printed or shared digitally. Take a close look at the overall layout, text readability, image quality, and color scheme. Make any necessary adjustments to ensure the card looks polished and professional.
-
Save and Export: Once you're satisfied with your design, save the project within the wedding card maker software. This will allow you to revisit and make further modifications later if needed. Additionally, you'll typically have the option to export the design in a suitable file format, such as JPEG or PDF, for printing or sharing digitally. Choose the appropriate file format based on your intended use.
Remember, the specific steps and features may vary depending on the wedding card maker software you're using. It's always a good idea to consult the software's documentation or help section for more detailed instructions tailored to the specific tool you're working with.
Here are some common limitations to consider
While wedding card maker software offers convenience and pre-designed templates, it may come with certain limitations.
🔷 Lack of Personalization Options: Although wedding card maker software provides customization features, the extent of personalization may be limited. The available fonts, colors, and design elements might not fully align with your desired theme or aesthetic. It may be challenging to find the exact style or design you envision, resulting in a compromise on personalization.
🔷 Difficulty Creating a Unique Design: With pre-designed templates, it can be difficult to create a truly unique wedding card. Many other users may have access to the same templates, resulting in similar designs across different weddings. If you're aiming for a distinct and personalized card, the software's limited options may hinder your ability to achieve a one-of-a-kind design.
🔷 Restrictive Layout Options: Wedding card maker software often provides predefined layouts that may not suit your specific requirements. You may have limited flexibility in modifying the arrangement of text boxes, images, or other design elements. This can be particularly challenging if you have a complex or unconventional design in mind.
🔷 Limited Image and Graphics Quality: While some wedding card maker software allows you to upload your own images, the resulting print quality may not always meet your expectations. The software may compress or reduce the resolution of the images, resulting in a lower quality output when printed. This can affect the overall visual appeal and professionalism of your wedding card.
🔷 Inability to Incorporate Custom Artwork: If you have custom artwork, illustrations, or calligraphy that you want to include in your wedding card, the software's limitations may restrict your ability to do so. The software may not have the capability to import or integrate external artwork seamlessly, limiting your options for personalization.
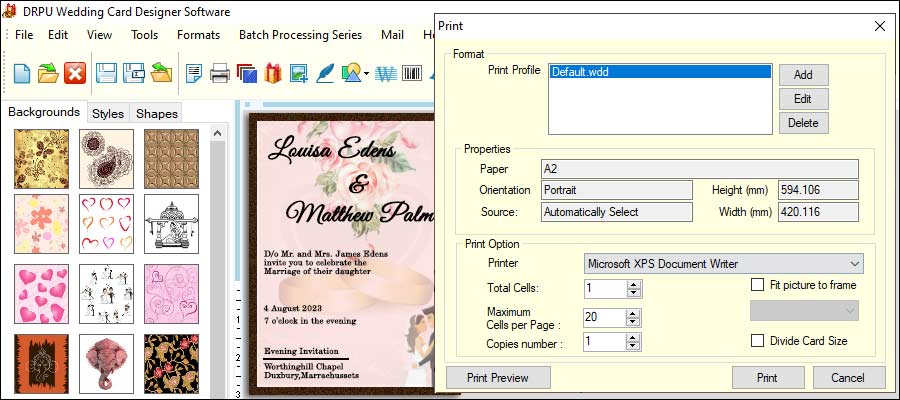
🔷 Limited Print Options: Wedding card maker software often focuses on digital output, but if you prefer printed cards, the software's printing options may be limited. You may have fewer choices in terms of paper quality, finishes, or specialized printing techniques. This can affect the overall tactile experience and perceived quality of the final printed cards.
🔷 Learning Curve and Technical Limitations: Some wedding card maker software may have a learning curve, especially if you're unfamiliar with graphic design or editing tools. The software's interface and functionality may not be intuitive, requiring time and effort to navigate and utilize effectively. Additionally, the software may have technical limitations, such as compatibility issues with certain operating systems or restricted file export formats.
Optimizing Wedding Card Design for Print
When optimizing your wedding card design for print, there are several important factors to consider, including resolution, color mode, bleed margins, and best practices for working with printers. Here's a detailed explanation of each aspect:

-
Resolution:
Resolution refers to the number of pixels per inch (ppi) in your design. For print, it's essential to use high-resolution images and graphics to ensure crisp and clear output. A resolution of 300 ppi is generally considered standard for print. To set up the correct resolution in your design software (e.g., Adobe Photoshop or Illustrator), create a document with the desired dimensions and set the resolution to 300 ppi. This ensures that your text and images will appear sharp when printed.
-
Color Mode:
Color mode determines how colors are represented in your design. The two primary color modes used in print are CMYK and RGB. CMYK (Cyan, Magenta, Yellow, Black) is the standard color mode for printing, as it represents the four ink colors used in the printing process. RGB (Red, Green, Blue) is used for digital displays such as computer screens. To optimize your wedding card design for print, ensure that you're working in CMYK color mode to accurately represent the colors that will be printed. Most design software allows you to set the color mode when creating a new document.
-
Bleed Margins:
Bleed refers to the area beyond the final trim size of your wedding card design. It's necessary because printers cannot print right up to the edge of a sheet of paper. Bleed ensures that when the design is trimmed to its final size, there are no white borders or unwanted edges. The standard bleed size is typically 0.125 inches (or 3 mm) on each side. To set up bleed margins, extend the background or design elements beyond the trim size by the specified amount. This ensures that even if there is slight shifting during the trimming process, there won't be any white edges visible.
Best Practices for Working with Printers:
To ensure a smooth printing process and high-quality output, consider the following best practices when working with printers:
-
1Communication: Maintain clear and open communication with your printer throughout the design process. Discuss your requirements, specifications, and any special instructions. They can provide valuable guidance on the technical aspects of printing your wedding cards.
-
2 File Format: Save your final design in a high-quality, print-ready file format, such as PDF. This format preserves your design's integrity and ensures compatibility across different printers and software.
-
3 Color Calibration: Ensure that your monitor is properly calibrated to display colors accurately. This helps avoid any color variations between what you see on your screen and the final printed result.
-
4Proofreading: Before sending your design to print, carefully proofread all the text and double-check the layout. Typos or mistakes can be costly to correct once the printing process begins.
-
5 Test Prints: Request a test print or a small sample run before proceeding with the entire print job. This allows you to check the colors, text clarity, and overall appearance of the printed cards. If any adjustments are needed, they can be made before mass production.
-
6 Printer's Requirements: Familiarize yourself with the printer's specific requirements and guidelines. They may have recommendations regarding file format, color profiles, or any specific settings they prefer. Adhering to these guidelines ensures a smoother printing process.
Conclusion: By following these optimization techniques and best practices, you can ensure that your wedding card design is print-ready, and the final result meets your expectations. Remember, it's always a good idea to consult with your printer directly to address any specific requirements or concerns they may have.