Gate Pass Maker: Working Steps, Installation, and Features
Gate pass maker software is typically designed to help organizations or individuals create and manage gate passes for visitors or employees. These gate passes serve as temporary authorization documents that allow individuals to access a specific area, building, or event. Here's a step-by-step overview of how such software could work:
Last Updated On:
Step-by-Step overview of how Gate Pass Software could Work

-
❖ Installation and Setup:
Download and install the gate pass maker software on your computer or access it through a web-based application. Follow the installation instructions provided by the software provider.
-
❖ User Registration:
Create an account within the software by providing the necessary information, such as your name, email address, and any other required details. Some software may also require administrator-level access to set up user roles and permissions.
-
❖ User Interface:
Once logged in, you will typically see a user interface that allows you to navigate through various features and options of the software.
-
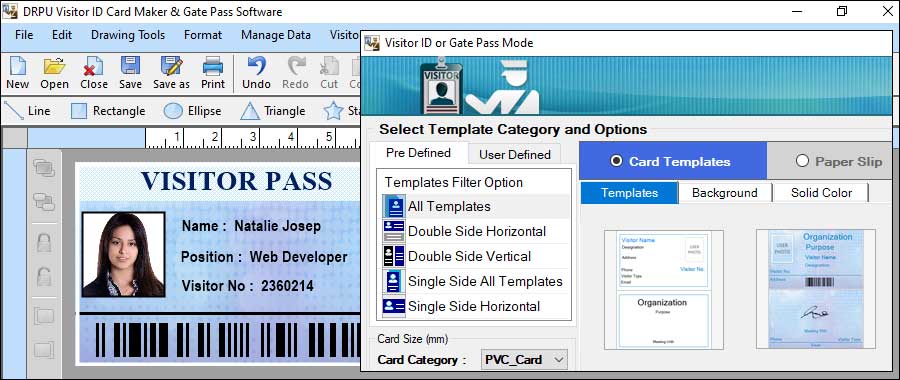
❖ Template Selection:
Choose from pre-designed gate pass templates or create your custom design. Templates may include fields for visitor/employee details, purpose of visit, date, time, and other relevant information.
-
❖ Data Input:
Enter the required information for each gate pass, such as the visitor/employee name, contact details, ID proof, visit duration, and any additional information specific to your organization's requirements.
-
❖ Customization:
Modify the gate pass template if needed. This may include changing fonts, colors, adding a logo, or incorporating other branding elements to align with your organization's visual identity.
-
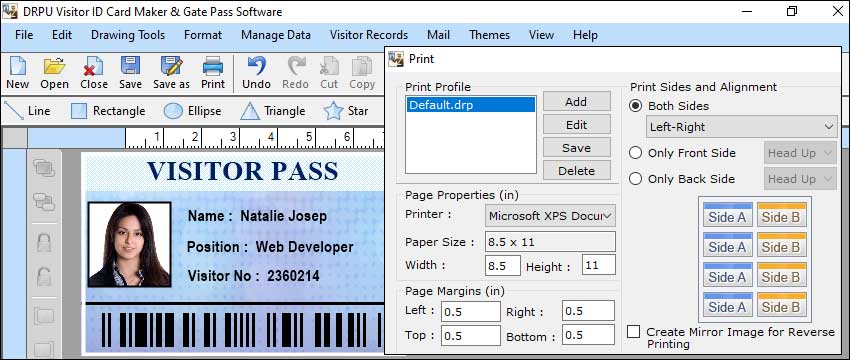
❖ Printing:
Generate and print the gate pass using a connected printer. Some software may also allow you to save the gate pass as a digital file for electronic distribution or email it directly to the visitor/employee.
-
❖ Record Keeping:
Gate pass maker software may provide a record-keeping feature to maintain a database of issued gate passes. This allows for easy retrieval of information, tracking visitor/employee history, and generating reports if necessary.
-
❖ Expiry and Revocation:
Gate passes are usually time-limited. The software may provide options to set the validity period for each pass. Additionally, there should be provisions to revoke or cancel gate passes in case of emergencies or changes in access permissions.
Install and Set up Gate Pass Maker Software
-
Obtain the Software:
Visit the official website or the appropriate software provider to download the installation files for Gate Pass Maker software. Ensure that you have the correct version compatible with your operating system.
-
Check System
Requirements:
Before installing the software, review the system requirements specified by the software provider. Ensure that your computer meets the minimum hardware and software specifications necessary for the software to run smoothly.
-
Run the Installer:
Once you have the installation files, double-click on the executable file to launch the installer. Follow any on-screen prompts or instructions provided by the installer.
-
Choose Installation
Options:
During the installation process, you may be presented with options to customize the installation, such as selecting the installation directory or additional features/modules to include. Make your desired selections and proceed with the installation.
-
Accept License
Agreement:
Read and accept the software's end-user license agreement if prompted. It is essential to understand the terms and conditions before proceeding with the installation.
-
Wait for Installation:
The installer will copy the necessary files to your computer and configure the software components. The duration of the installation process may vary depending on the software's size and complexity.
-
Launch the Software:
Once the installation is complete, you may be prompted to launch the software. If not, locate the software's shortcut icon on your desktop or in the Start menu and double-click it to launch the application.
-
Initial Setup and
Configuration:
Upon launching the software for the first time, you might be required to go through an initial setup process. This could involve providing basic information, setting up user accounts, configuring preferences, or connecting to a database if applicable. Follow the on-screen instructions to complete the setup.
-
Activate or Register:
Depending on the software, you may need to activate or register the software using a license key or by creating an account. Follow the provided instructions to activate or register the software, ensuring compliance with any licensing requirements.
-
Customize and
Personalize:
Explore the software's settings and options to customize it according to your requirements. This might include configuring templates, adding company logos, setting up access controls, or defining workflow processes specific to your organization.
Note: It's important to note that these steps are general guidelines, and the actual installation and setup process may differ depending on the specific Gate Pass Maker software you are referring to.
Features of Gate Pass Maker Software
Here are some common features found in visitor management software:

-
Visitor
Registration:
This feature allows users to register visitors by capturing their essential information such as name, contact details, purpose of visit, and any other relevant details. It may include customizable registration fields to suit specific needs.
-
ID Badges and Pass
Printing:
Gate pass software often enables the creation and printing of visitor badges or passes. These badges can be customized with visitor details, including their name, photo, date, time, and purpose of visit. The system may support various badge formats and templates.
-
Check-In/Check-Out:
The software facilitates a smooth check-in and check-out process for visitors. It may include options for self-registration or assisted check-in by the receptionist or security personnel.
-
Data Security and
Compliance:
Gate pass software should prioritize data security and compliance with privacy regulations. It should offer features like data encryption, access controls, and secure storage to protect visitor information.
-
Pre-Registration
and Pre-Authorization:
Some software may allow pre-registration of visitors, enabling hosts to send invitation emails with a unique QR code or passcode. This expedites the check-in process and enhances security by validating visitors in advance.
-
Security and
Watchlist Integration:
Gate pass software can integrate with security systems and watchlist databases to screen visitors against known threats or flagged individuals. This integration helps enhance security measures and maintain a safe environment.
-
Integration with
Access Control Systems:
Some gate pass software can integrate with access control systems, allowing visitors with valid passes to gain entry to specific areas or buildings. Integration enables seamless movement through secured areas while ensuring compliance with access policies.
-
Visitor
Pre-Screening:
This feature allows hosts to pre-screen visitors by collecting additional information or documents before their arrival. It helps streamline the check-in process and ensures that visitors meet specific requirements or comply with security protocols.
-
Reporting and
Analytics:
Gate pass software often includes reporting and analytics capabilities. It can generate detailed reports on visitor statistics, peak visiting hours, visitor demographics, and other relevant data. These insights assist in optimizing resources and improving visitor management processes.
-
Notifications and
Alerts:
The software can send automatic notifications or alerts to the host or concerned personnel when a visitor arrives or exceeds their authorized visit duration. This feature ensures timely responses and improves overall security.