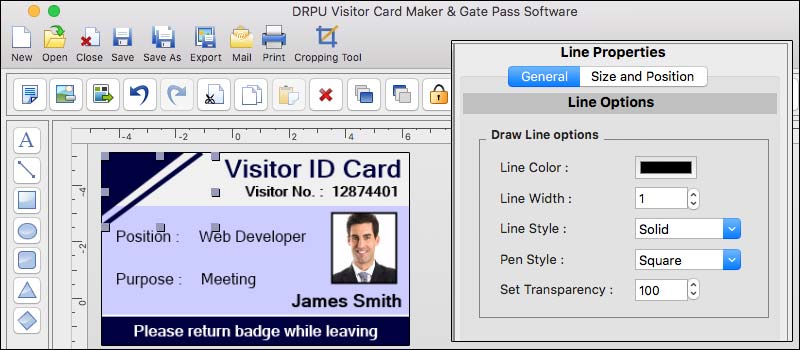
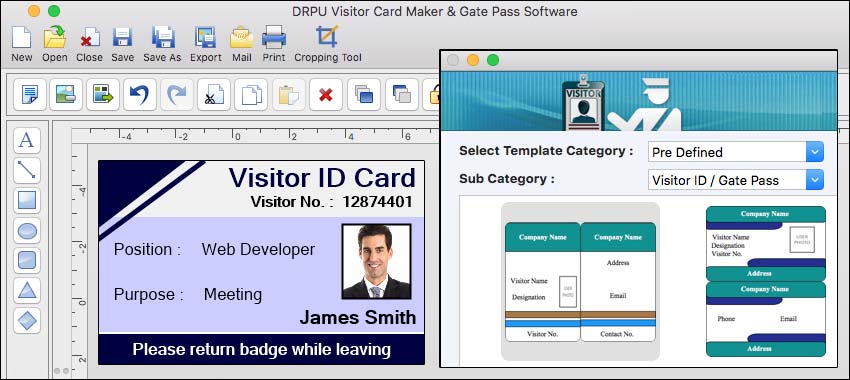
Use own Images and Design Elements with Visitors ID Cards Maker for Mac
You can use your own images and design elements with ID card maker software on a Mac.

-
Launch the ID Card Maker
Software:
Open the ID card maker software on your Mac. Depending on the specific software you are using, the interface may vary, but the general steps should be similar.
-
Create a New ID Card
Project:
Start a new project within the ID card maker software. This might involve selecting a template or specifying the dimensions and settings for your ID cards.
-
Customize the Design:
Once you have your new project set up, you can begin customizing the design. Look for options like "Design" or "Customize" that allow you to access the design tools and features.
-
Import Your Images:
Most ID card maker software applications provide an option to import images. Look for an "Import Image" or "Add Image" button within the software's design interface. Click on it, and a file browser window will appear.
-
Locate Your Image Files:
Browse your computer's file system to find the images you want to use in your ID cards. Select the image file(s) you wish to import and click "Open" or a similar button to import them into the software.
-
Position and Resize
Images:
After importing the images, you can place them onto the ID card design canvas. Typically, you can click and drag to position the image and use resizing handles to adjust its size and proportions. Repeat this step for each image you want to add.
-
Apply Effects or Edits
(if available):
Depending on the software, you may have options to apply effects or make edits to your imported images. Explore the software's image editing features to enhance or modify your images as desired.
-
Add Design Elements:
Apart from images, you can also add design elements like shapes, lines, text boxes, backgrounds, or logos to your ID card design. Look for options like "Insert Shape" or "Add Text" to access the design elements available in the software.
-
Customize Design
Elements:
Once you have added design elements, you can customize them according to your preferences. This may include adjusting their size, position, color, font style, or other properties. Use the provided tools and options to make the desired modifications.
-
Save Your Design:
Once you are satisfied with your ID card design, save your project within the ID card maker software. This will allow you to revisit and modify the design later if needed.
-
Print or Export the ID
Cards:
Once your design is finalized, you can proceed to print the ID cards directly from the software if it supports printing capabilities. Alternatively, you may have options to export your design as a printable file format, such as PDF or JPEG, which you can then send to a professional printing service or use with your own printing equipment.
Note: Remember that the actual steps and available features may vary depending on the specific ID card maker software you are using.
Import Data from other Sources to use with Visitors ID Cards Maker for Mac
you can import data from other sources to use with various applications on a Mac. Here is a guideline to follow:-
-
Identify the Data Source:
Determine the location and format of the data you want to import. It could be stored in various sources such as spreadsheets, databases, or CSV files.
-
Prepare the Data:
Ensure that the data you want to import is properly organized and formatted according to the requirements of the ID card maker software. This may involve arranging the data into columns, naming fields appropriately, and verifying data integrity.
-
Export Data from the Source:
If your data is stored in a spreadsheet application like Microsoft Excel or Google Sheets, you can typically export the data as a CSV (Comma-Separated Values) file. If the data resides in a database, you might need to use a database management tool to export the data in a compatible format.
-
Launch the ID Card Maker Software:
Open the Visitors ID Cards Maker application on your Mac.
-
Locate the Import Feature:
Explore the user interface of the ID card maker software to find the option for importing data. It might be available in the File menu or as a dedicated import button.
-
Choose the Import Method:
Depending on the software, you may have different options for importing data. Look for options like "Import from CSV" or "Import from File" and select the appropriate one.
-
Select the Data File:
Browse your computer's file system to locate the exported data file (CSV or another compatible format) you prepared in Step 2. Select the file and proceed.
-
Map the Fields:
The ID card maker software will typically prompt you to map the fields from your data source to the corresponding fields in the application. This step ensures that the data is correctly aligned and assigned to the appropriate categories.
-
Review and Validate:
Once the fields are mapped, the software may present a preview of the imported data. Take the time to review the imported data and ensure its accuracy. Make any necessary adjustments or corrections if required.
-
Import the Data:
If everything looks correct, proceed with the import process. The software will import the data from your selected file and populate it into the appropriate fields within the ID card maker application.
-
Utilize the Imported Data:
With the data successfully imported, you can now use it within the ID card maker software. You may be able to generate ID cards automatically based on the imported data or customize them further using the provided tools and templates.
Common Features You might Find in Visitors ID Cards Maker for Mac
Some common features you might find in such software include:

-
Templates:
A selection of pre-designed templates that you can customize with your own text, images, and branding.
-
Barcodes and QR Codes:
Integration with barcode or QR code generators to include scannable elements for tracking and security purposes.
-
Customization Options:
Tools to personalize the ID cards with visitor names, photos, company logos, and other relevant information.
-
Badge Elements:
The ability to add various design elements such as background colors, shapes, borders, and patterns to enhance the appearance of the ID cards.
-
Data Import:
Capability to import visitor data from external sources like spreadsheets or databases to automate the creation of multiple ID cards.
-
Printing Options:
Support for different ID card sizes and the ability to print directly from the software or export the designs for professional printing.
-
Security Features:
Options for adding security measures like holograms, watermarks, or other anti-counterfeiting elements to enhance the ID card's authenticity.
Cost of Visitors ID Cards Maker for Mac
The cost of visitor ID card maker software for Mac can vary depending on several factors such as the features and functionality provided, the brand or developer, and the intended use of the software. There are various options available in the market, ranging from free software with basic features to more advanced and professional solutions that come with a price tag.
Here are a few points to consider when evaluating the cost of visitor ID card maker software:
-
Features:
The pricing of software often correlates with the features and capabilities it offers. Basic ID card makers may provide essential design tools, templates, and limited customization options. More advanced software might include additional features such as database integration, barcode support, biometric data capture, visitor log management, and integration with access control systems. The complexity and comprehensiveness of these features can influence the cost.
-
User Interface and Ease of
Use:
User-friendly interfaces and intuitive design tools can be advantageous for those without graphic design experience. Software that offers a simple drag-and-drop interface or ready-made templates can save time and effort. However, if the software provides more advanced design features, it might require a steeper learning curve.
-
Support and Updates:
Consider whether the software includes customer support and regular updates. Ongoing support can be crucial in case of technical issues or if you require assistance in utilizing the software to its full potential. Updates ensure that the software remains compatible with the latest Mac operating systems and includes new features and security patches.
-
Integration and
Compatibility:
Check if the visitor ID card maker software is compatible with your Mac operating system version. Additionally, if you need to integrate the software with other systems or databases, ensure it supports the necessary file formats and APIs.
-
Pricing Model:
Determine whether the software is offered as a one-time purchase, subscription-based, or with licensing fees. Consider your budget and evaluate the value and long-term costs associated with each pricing model.
Conclusion: To find the most up-to-date and accurate information about visitor ID card maker software for Mac, I recommend conducting an online search or visiting software developer websites. This will allow you to compare different options, evaluate their features, and determine the pricing that suits your specific requirements.