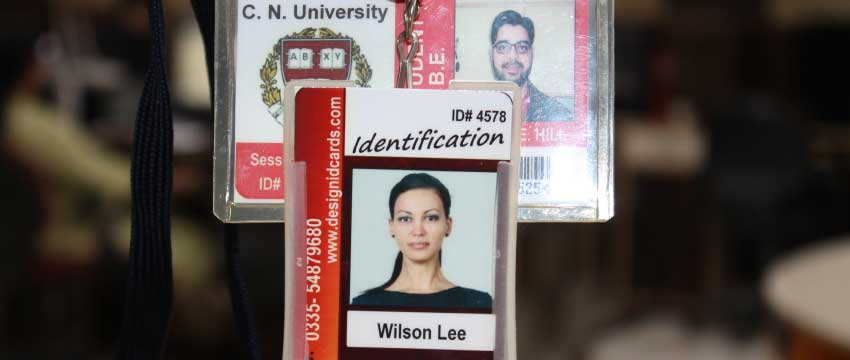
To create custom templates using a Student ID Badge maker, you would typically follow these steps:

-
Choose a Student ID Badge Maker Tool:
There are several software options available for creating ID badges, ranging from online platforms to desktop applications. Some popular options include Adobe Photoshop, Canva, ID Flow, and Easy Card Creator. Select the tool that suits your needs and budget.
-
Select a Template or Start from Scratch:
Depending on the software you're using, you might have the option to choose from pre-designed templates or start with a blank canvas. If templates are available, browse through the options and select one that matches your desired design or customize it to fit your requirements.
-
Customize the Template:
Once you've chosen a template or started with a blank canvas, you can begin customizing the design elements. This typically involves adding text fields, uploading student photographs, incorporating school logos, and arranging the elements in an pleasing manner.
-
Add Student Information:
Using the Student ID Badge maker, you can create fields for relevant student information. This might include fields for the student's name, photograph, student ID number, grade level, or any other details you want to include on the badge.
-
Print the Badges:
After creating the custom template, you can use the Student ID Badge maker to print the badges. The software may provide options for selecting paper size, print quality, and other settings to ensure the badges are produced accurately.
-
Cut and Distribute the Badges:
After printing the badges, you would typically cut them out along the designated lines or use a specialized badge cutter if available. Distribute the badges to the students and ensure they wear them visibly for identification purposes.
-
Launch the Software:
Install the chosen Student ID Badge maker software on your computer and open it to begin the badge creation process.
-
Customize the Design Elements:
The Student ID Badge maker software usually provides various options to customize the design elements. You can choose different fonts, colors, sizes, and styles for the text, adjust the layout, add borders or backgrounds, and include any additional graphics or icons that enhance the overall look of the badge.
-
Preview and Make Adjustments:
Before finalizing the template, it's crucial to preview the design and make any necessary adjustments. Check for any errors, ensure that the text and images are legible, and make sure the overall design is visually appealing.
-
Save the Template:
Once you are satisfied with the design, save the template within the Student ID Badge maker software. This allows you to reuse the template for future badges or make further edits if needed.
➤By following these steps, you can utilize a Student ID Badge maker to create custom templates tailored to your specific requirements and design preferences.
Benefits of Using Student ID Badge Designing Software
Using Student ID Badge designing software offers several benefits for educational institutions. Here are some key advantages:
-
Improved Security:
Student ID badges serve as a visual identification tool, and using dedicated software to design them enhances security in the following ways:
Easy Identification: ID badges make it easy for staff members to identify students and distinguish them from outsiders or unauthorized individuals on campus.
Access Control: ID badges can be integrated with access control systems, allowing only authorized individuals to enter certain areas or participate in specific activities.
Visual Verification: The inclusion of student photos on the ID badges helps verify the identity of students and prevents impersonation or unauthorized access.
-
Streamlined Administrative Processes:
Student ID Badge designing software simplifies administrative tasks and processes, leading to increased efficiency and time savings:
Automated Data Population: By integrating with student information systems or databases, the software automatically populates student data onto the ID badges. This eliminates the need for manual data entry, reducing errors and saving time.
Bulk Badge Printing: The software enables batch printing of ID badges, allowing administrators to quickly generate badges for multiple students simultaneously.
Database Management: The software often includes features to manage and update the student database, ensuring that ID badges remain up to date with the latest student information.
-
Personalization and Branding:
Student ID Badge designing software allows institutions to customize ID badges to reflect their branding and individuality:
Custom Design: The software offers design features such as templates, color schemes, fonts, and graphics that can be tailored to match the institution's visual identity.
Inclusion of Logos and Mascots: Institutions can incorporate their logos, mascots, or other relevant branding elements on the ID badges, fostering a sense of pride and school spirit.
-
Enhanced Communication and Community:
Student ID badges can facilitate communication and foster a sense of community within the educational institution:
Student-Teacher Interaction: ID badges can include teacher or advisor names, making it easier for students to identify and approach the appropriate staff members.
Event Participation: ID badges can be used as tickets or passes for school events or extracurricular activities, simplifying the check-in process and promoting student involvement.
-
Integration with Other Systems:
Student ID Badge designing software often integrates with other systems used in educational institutions, providing additional benefits:
Access Control Integration: By integrating with access control systems, ID badges can streamline entry and exit processes, ensuring only authorized individuals gain access to secure areas.
Attendance Management: Some software integrates with attendance management systems, allowing for automatic tracking of student attendance by scanning ID badges.
-
Cost Savings:
While there may be an initial investment in the software, using dedicated Student ID Badge designing software can result in long-term cost savings:
Printing Efficiency: The software enables efficient printing, reducing waste and optimizing the use of printing materials.
Time Savings: Automation of administrative tasks, streamlined processes, and batch printing capabilities save staff members' time, allowing them to focus on other important responsibilities.
