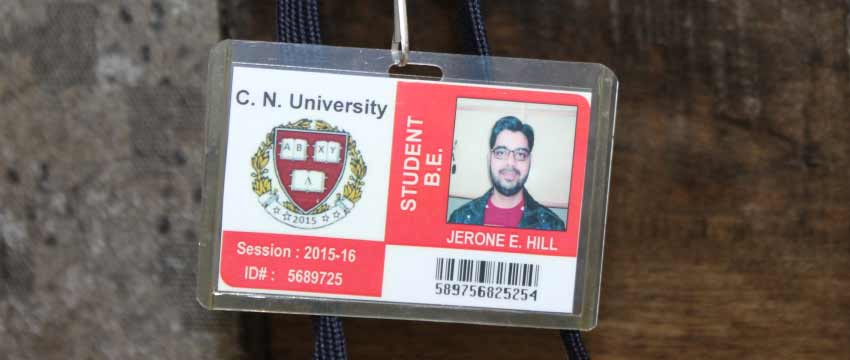
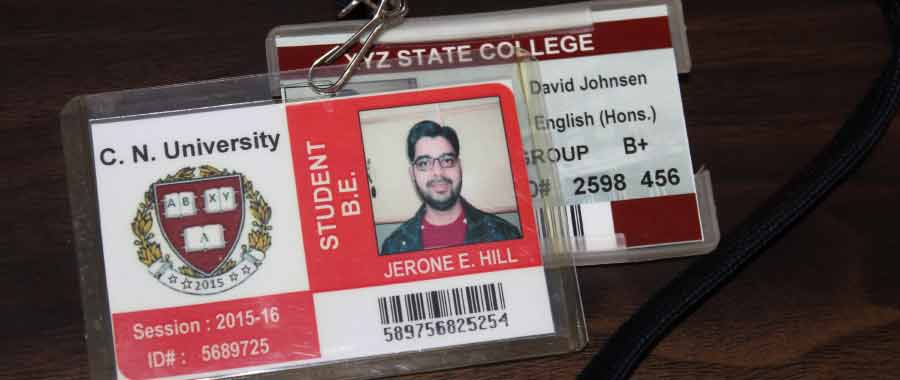
Design Tools Available in a Student ID Badges Maker
A Student ID Badge maker typically utilizes various design tools to create customized identification badges for students. These tools allow users to design and personalize the badges according to their requirements. Here are some common design tools available in a Student ID Badge maker:

-
Template Library:
A template library provides a collection of pre-designed badge templates that users can choose from. These templates usually come in different styles, layouts, and color schemes, making it easy to create professional-looking badges quickly.
-
Text Editor:
The text editor tool enables users to add and edit text on the badge. It allows customization of font styles, sizes, colors, and alignment. Users can enter student information such as name, ID number, grade, and other relevant details.
-
Image Upload:
This feature allows users to upload images to include on the badges. It can be used to add student photographs, school logos, or other graphics that enhance the badge's visual appeal and identification purposes.
-
Layering and Object Arrangement:
Some ID badge makers offer the ability to layer objects and arrange them in a specific order. This feature enables users to position elements precisely, apply effects like shadows or transparency, and create complex badge designs.
-
Barcode/QR Code Generator:
A barcode or QR code generator is a useful tool for embedding scannable codes on ID badges. These codes can contain student-specific information, such as the ID number or other relevant data, which can be quickly read by barcode scanners or smartphones.
-
Data Import/Integration:
In more advanced badge makers, there may be options to import student data from spreadsheets or integrate with student information systems (SIS). This streamlines the badge creation process by automatically populating student information onto the badges.
-
Color Palette and Customization:
Design tools typically provide a color palette or color picker to select different colors for text, backgrounds, shapes, and other design elements. This allows users to match the badge design with their school colors or create visually appealing combinations.
-
Export and Print Options:
Once the badge design is complete, these tools allow users to export the design as a printable file format, such as PDF or high-resolution image formats like JPEG or PNG. This facilitates easy printing or sharing of the badges with a professional printing service.
-
Shapes and Borders:
Design tools often include a range of shapes and borders that can be added to the badges. These elements can be used for decorative purposes, to highlight specific information, or to create a distinctive design for different categories of students (e.g., different borders for different grade levels).
-
Preview and Proofing:
To ensure the design meets expectations, many badge makers offer a preview mode. This allows users to see how the final badges will appear before printing. Additionally, some tools provide proofing options to review and verify the accuracy of student information and design elements.
Conclusion: These design tools collectively enable users to create visually appealing and informative Student ID Badges that serve as effective identification tools within educational institutions.
Create Custom Templates Using a Student ID Badges Maker
Many student ID badges makers allow you to create custom templates for your ID badges. Custom templates give you the flexibility to design ID badges that align with your institution's branding, preferences, and specific requirements. Here's an explanation of how you can create custom templates using a student ID badges maker:
-
Choose a Reputable ID
Badges Maker:
Select a student ID badges maker that offers customization options and has a user-friendly interface. Ensure that the software provides the necessary features for creating custom templates, such as the ability to add images, text fields, and design elements.
-
Access the Template
Editor:
Once you have chosen a suitable ID badges maker, access the template editor within the software. This is where you can design and customize the layout of your ID badges.
-
Select the Dimensions
and Orientation:
Determine the dimensions and orientation of your ID badges. Typically, ID badges are rectangular in shape, similar to a standard credit card, with dimensions such as 2.125" x 3.375". Choose the appropriate size based on your requirements and the available options in the ID badges maker.
-
Design the Layout:
Use the template editor's design tools to create the layout for your ID badges. You can add elements such as text boxes, image placeholders, shapes, and lines to the template. Consider including fields for student name, photograph, identification number, institution name/logo, and any other relevant information required by industry standards or your institution's policies.
-
Customize the
Appearance:
Adjust the appearance of the ID badge template to match your institution's branding guidelines. This may involve selecting appropriate fonts, colors, and styling options. Ensure that the design is visually appealing, easy to read, and professional.
-
Add Security Features:
If industry standards or your institution's requirements call for security features, incorporate them into the template. This can include elements like holograms, barcodes, QR codes, or other security measures provided by the ID badges maker.
-
Save the Template:
Once you are satisfied with the design of your custom template, save it within the ID badges maker. This allows you to reuse the template for future ID badge creations or modifications.
-
Test the Template:
Before producing a large batch of ID badges, it's advisable to test the template by printing a sample badge. Verify that all the elements are correctly positioned, the text is legible, and the design meets your expectations. Make any necessary adjustments or refinements if required.
-
Apply the Template to
Individual Badges:
After finalizing the template, you can apply it to individual ID badges. The ID badges maker will typically provide options to input specific student information, such as names and photographs, directly into the template fields.
Conclusion: By following these steps, you can create custom templates using a student ID badges maker. This allows you to design ID badges that are unique to your institution, meet industry standards, and effectively represent your students.
Create Student ID Badges with Different Designs and Layouts
You can create student ID badges with different designs and layouts using a student ID badges maker. A student ID badges maker is a tool or software that allows you to design and customize ID badges specifically for students.

Here's a step-by-step explanation of how you can use a student ID badges maker to create badges with different designs and layouts:
-
Choose a Student ID Badges
Maker:
There are various ID badge makers available, both online and offline. You can search for reputable ID badge maker software or websites that offer customization options.
-
Install or Access the ID
Badge Maker:
If you are using offline software, install it on your computer. If it's an online tool, visit the website and create an account if necessary.
-
Select a Template or Start
from Scratch:
Most ID badge makers provide a range of pre-designed templates to choose from. These templates usually include different layouts, color schemes, and styles. Alternatively, you can opt to create a badge from scratch and design it entirely according to your preferences.
-
Customize the Badge Design:
Once you've selected a template or started from scratch, you can begin customizing the design. This customization typically includes options like adding text, images, logos, backgrounds, and shapes. You can also change fonts, colors, and sizes to match your desired design.
-
Add Student Information:
To personalize the ID badge, you'll need to include specific information about the student. This may include their name, photo, student ID number, grade, school logo, and any other relevant details. The ID badge maker should provide fields or options to input and arrange this information on the badge.
-
Adjust Layout and
Positioning:
Depending on the ID badge maker, you can often modify the layout and positioning of elements on the badge. This allows you to arrange the student's information, images, and other design elements in a visually appealing manner.
-
Review and Finalize:
Once you're satisfied with the design and layout, review the badge to ensure all information is accurate and properly placed. Make any necessary adjustments or refinements before finalizing the design.
-
Save or Export the ID Badge:
After finalizing the design, you can save or export the ID badge in a suitable file format, such as JPEG or PDF. This allows you to print the badges or share them digitally as needed.
Remember to comply with any guidelines or requirements set by your educational institution regarding student ID badge designs. They may have specific rules about logo usage, dimensions, or other restrictions that you need to follow.
Conclusion: Overall, using a student ID badge maker provides you with the flexibility to create badges with different designs and layouts to suit your preferences and requirements.